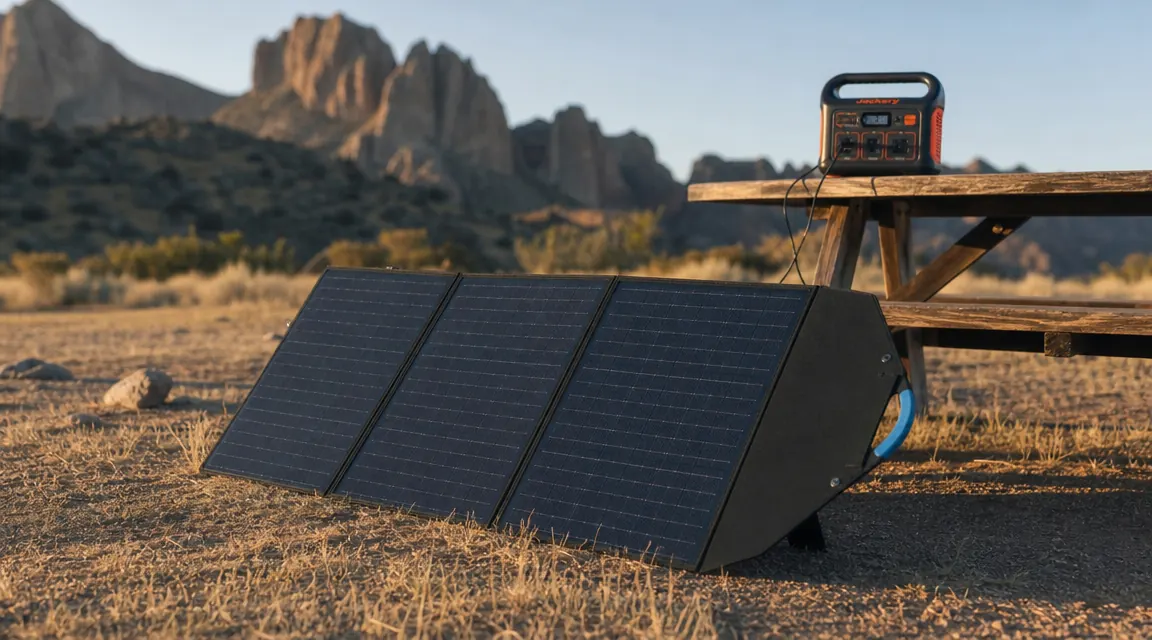
I bought my first portable power station after a three-day camping trip where my car's 12V outlet died somewhere on day two. I had a fridge running off it for the cooler, a CPAP to power at night, and a phone that was perpetually at 11 percent. When I got back home I ordered both a 1000Wh station and a 200W solar panel within the same week, partly out of spite and partly because I work ER shifts and being unprepared genuinely bothers me. What I did not have was a clean, technically honest guide to hooking them together. I had to work that out myself through trial and error, a few bad cable buys, and one afternoon staring at an input-voltage spec sheet I did not initially understand.
This guide covers what I wish someone had laid out for me: which connector you need, how to check whether your station will even accept your panel's voltage output, how to angle the panel for real-world conditions rather than lab conditions, and what recharge time to actually expect on a 1000Wh station with 200W of solar. The primary panel I reference throughout is the Renogy 200W Portable Solar Panel (ASIN B0CNPHD4VY), which I have run extensively. The math applies to any 200W monocrystalline portable, but the connector specs are Renogy-specific.
If you need 200W of portable solar that works with most stations out of the box, this is the panel I use.
The Renogy 200W foldable panel is IP65 waterproof, has four built-in kickstands, and ships with MC4 output cables. It pairs cleanly with any station that accepts MC4 or a common adapter. Currently rated 4.6 stars across 650 reviews.
Amazon Check Today's Price on Amazon →Step 1: Check Your Power Station's Solar Input Specifications
Before you plug anything in, open the manual or pull up the spec page for your station. You are looking for three numbers: maximum input voltage (V), maximum input current (A), and maximum input wattage (W). These are not suggestions. They are the limits the MPPT charge controller inside your station is designed to handle. Exceed the voltage ceiling and you can fry the controller. Most 1000Wh-class stations accept somewhere between 12V and 30V input at up to 10A or 12A, with a max solar input of 200W to 300W.
The Renogy 200W panel puts out 21.6V open-circuit voltage (Voc) and 9.27A short-circuit current (Isc) under Standard Test Conditions. That voltage is well within the safe input window of most 1000Wh stations, which typically cap at 28V to 35V open-circuit. Where people get into trouble is daisy-chaining two panels in series: two 21.6V panels in series gives you 43.2V open-circuit, which will exceed the input ceiling on many stations. If you want to run two 200W Renogy panels, wire them in parallel. Parallel keeps voltage the same but doubles current, bringing you to roughly 18.5A. You will need to confirm your station's current limit handles that before doing it.
The number the spec sheet reports as 'max solar input wattage' is what your MPPT controller is rated to harvest. My Jackery Explorer 1000 v2, for example, accepts 400W max solar input. The Renogy 200W panel running solo will never saturate that controller; I could add a second panel in parallel and still stay under the ceiling. Knowing this keeps you from buying a panel and then discovering your station will only accept 100W of it.
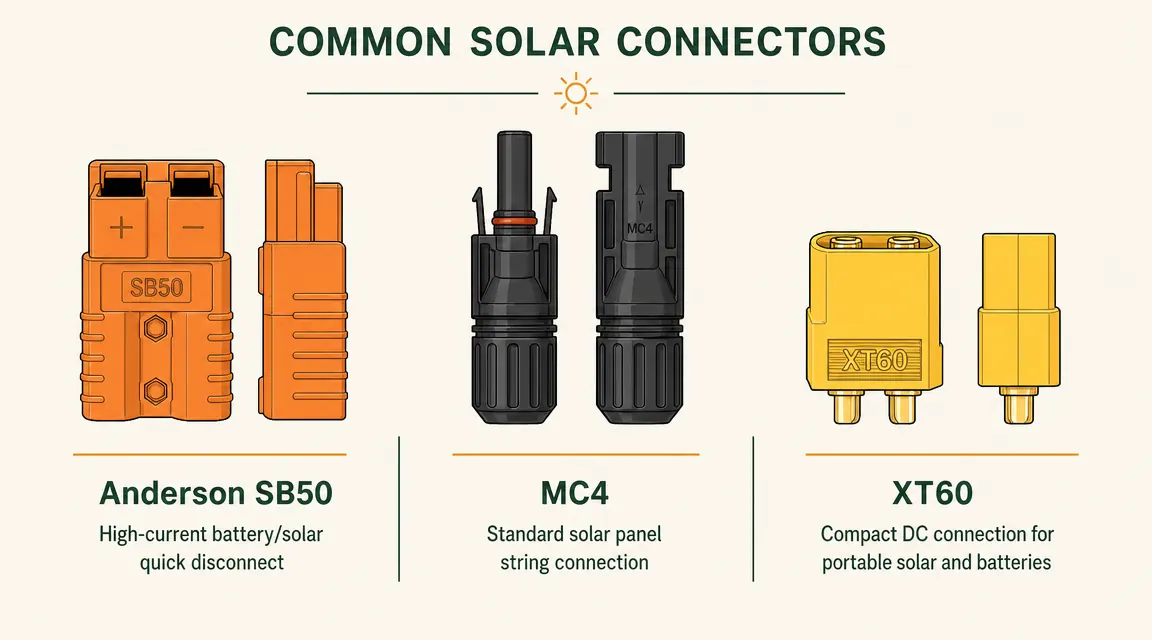
Step 2: Match Your Connector Types -- Anderson, MC4, and XT60
This is where most people waste money buying cables they do not need, or end up with a setup that looks connected but is not transferring power. There are three connector standards you will encounter in the portable solar world, and none of them mate directly with each other.
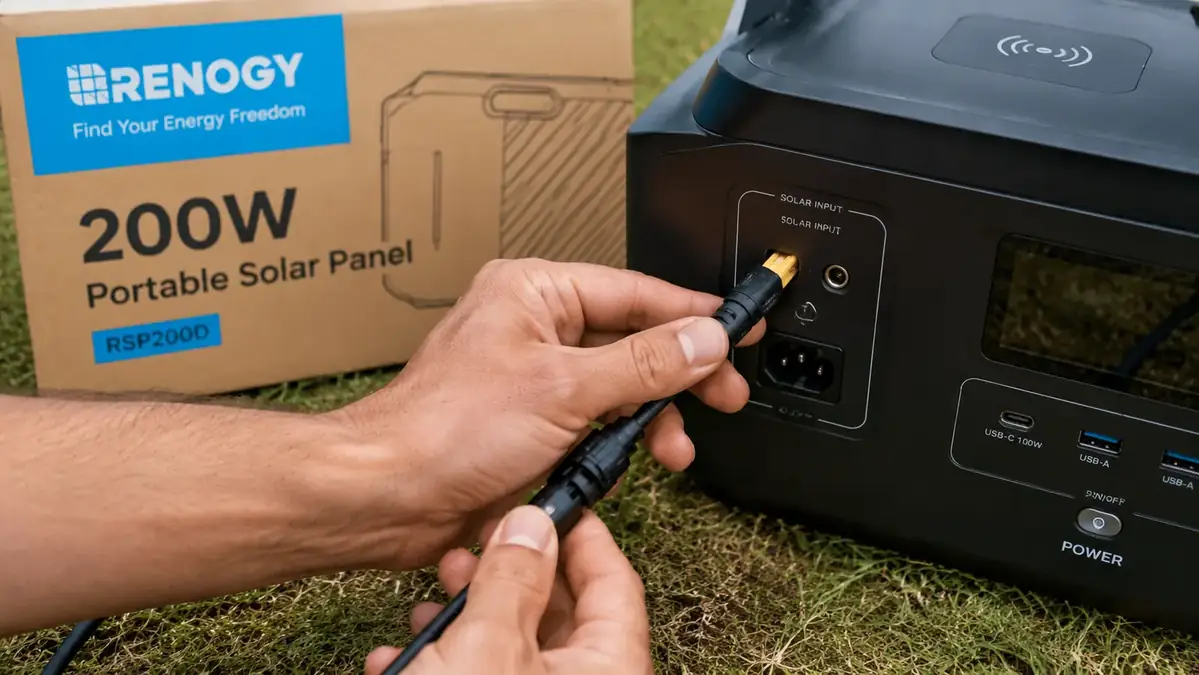
MC4 connectors are the industry standard for solar panel output. The Renogy 200W ships with two MC4 output pigtails, one positive and one negative. They are waterproof, rated for direct sun exposure, and lock with a quarter-turn. Most panel brands ship with MC4. If your power station has an MC4 input port -- and many of the higher-end stations do -- you plug straight in. Done. If your station uses a DC5521 barrel connector, you need an MC4-to-DC5521 cable. If it uses XT60, you need an MC4-to-XT60 adapter. Buy the adapter for your station before your first camping trip, not during. I keep three adapters in my kit and have never needed more.
Anderson SB50 connectors are common on Goal Zero and some Lion Energy products. They are large orange plastic housings with heavy-gauge spring contacts. If you own a Goal Zero Yeti, you will need an MC4-to-Anderson adapter to use the Renogy panel with it. Anderson connectors are robust and carry high current well, but they are not waterproof, so keep them under cover if rain is a possibility. XT60 is a smaller yellow connector seen most often on mid-tier stations from brands like Bluetti and some Jackery accessories. XT60-to-MC4 adapters are cheap and widely available.
One practical note: polarity matters on all of these connectors. MC4 connectors are keyed so you cannot mix positive and negative. Anderson and XT60 are not always keyed at the adapter level, so double-check the polarity markings on the adapter cable before connecting. A reverse-polarity connection will trip a protection circuit in most modern stations, not destroy it, but it will give you a confusing error code and zero charging.
Step 3: Position the Panel for Maximum Real-World Output
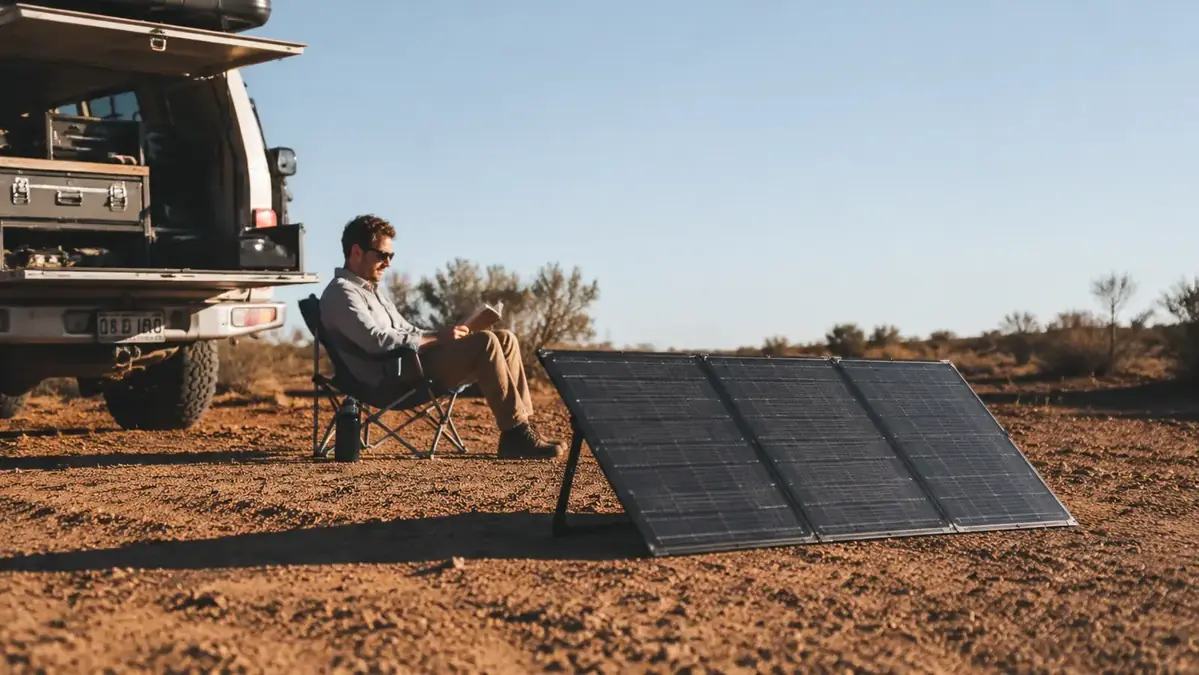
The standard solar industry figure is 1000 W/m2 irradiance at Standard Test Conditions, measured with the panel perpendicular to direct noon sun at sea level on a clear day. Your actual campsite is not a test lab. In practice, a ground-deployed panel in the summer Southwest will see roughly 800 to 900 W/m2 at solar noon if the sky is clear and the panel is clean. That means your 200W panel's realistic peak output is closer to 160W to 175W, not 200W. On a partly cloudy day in the Pacific Northwest in September, I have logged 60W to 90W sustained with the same panel.
The Renogy 200W has four kickstands built into the rear frame. They prop the panel at roughly 30 to 35 degrees, which is a reasonable compromise for summer use in the continental US. At 30 degrees, you catch most of the day's usable sun without having to reposition every hour. If you are stationary all day -- parked at a campsite, say -- you can add meaningfully to your daily harvest by tilting the panel toward the sun manually two or three times across the day: once at 9 a.m., once at noon, once at 3 p.m. I do this on longer trips when I need full replenishment. On shorter trips I just prop the kickstands and walk away.
Keep the panel out of shade. Even partial shade on one cell in a monocrystalline panel drops the output of the entire string dramatically, sometimes by 30 to 50 percent, depending on the bypass diode configuration. I lost nearly half my noon output one day because a tree was casting a six-inch shadow across the bottom edge of the panel. Move the panel clear of any shade source, including your own truck, awning, or canopy.
Step 4: Connect the Panel, Then the Station, and Confirm Active Charging
The sequence matters. Connect the solar panel to the adapter cable first, with the station's solar input port uncovered and ready. Then plug the adapter cable into the station. This order avoids any hot-plug voltage spike going directly into the port. On most modern stations it does not matter practically, but it is a good habit. Some older units from smaller brands do not have robust transient suppression.
Once connected, the station display should show a solar input reading within a few seconds. On the Jackery 1000 v2 this appears as a wattage number on the input side of the display. If you are seeing zero or unusually low wattage -- say 5W when it should be 100W-plus at noon -- troubleshoot in this order: check that the cable is fully seated at both ends, check that you do not have a reversed polarity on the adapter, verify the panel is in direct sun and not shaded, and confirm the station's solar input port is unlocked (a few stations have a manual input selector you have to toggle). If you see a fault code, look it up in the manual before trying again.
At noon on a clear day, I typically see 140 to 155W of actual MPPT harvest from the Renogy 200W. On a full summer day with six peak sun hours, that works out to around 800 to 900Wh delivered to the station before losses.

Step 5: Calculate Your Expected Recharge Time for a 1000Wh Station
Here is the math people want and rarely see spelled out clearly. A 1000Wh-class station is not truly 1000Wh usable from empty to full. Charging efficiency losses -- mostly heat in the MPPT controller and the battery's own charge acceptance curve -- run around 85 to 90 percent. So getting 1000Wh into the battery requires delivering roughly 1100 to 1175Wh from the panel. Call it 1100Wh for clean round numbers.
With the Renogy 200W panel in full sun at a well-tilted angle, I average about 145W of delivered charging power across the midday hours. If I set up at 8 a.m. and the sun cooperates until 6 p.m., I have roughly six to seven peak sun hours. That gives me 145W x 6.5 hours = 942Wh. Close to a full charge from near-empty, but not quite. On a really good day -- clear sky, correct angle, no partial shade, peak sun hours closer to 7 -- I can get the station from 5 percent to 100 percent in a single day. On a marginal day -- hazy, partly cloudy, I did not bother repositioning the panel -- expect 600 to 700Wh, which is roughly 60 to 70 percent of the station from empty.
The practical implication: one 200W panel and one 1000Wh station is a functional camping setup if you manage your loads. I run a 12V compressor fridge (about 40W average draw), phone and laptop charging, and LED lighting. That is roughly 600 to 700Wh per day of consumption. On a clear day I break even or gain ground. On two consecutive overcast days I start to feel the pinch. For that use case I would want either a second 200W panel in parallel (wiring permits, as noted in Step 1) or a station with 1500 to 2000Wh capacity.
What Else Helps
A few additions that make this setup noticeably more productive. First, a short extension cable (MC4 male to female, 10 to 15 feet) lets you position the panel away from the station for better sun exposure without moving the entire camp setup. I keep a 10-foot MC4 extension in my kit and use it almost every trip. Second, a basic clamp meter or inline watt meter gives you real-time confirmation of what the panel is delivering versus what the station's display is showing. The station display typically reads the MPPT output to the battery, which is slightly less than the raw panel output. Seeing actual wattage helps you decide whether repositioning the panel is worth the effort.
Third, keep the panel surface clean. A thin layer of road dust or campfire soot reduces output measurably. I wipe the Renogy panel with a damp microfiber cloth before the first use of each trip. The IP65 rating means you can run water over it without worry. Fourth, if you use the panel regularly in the same location -- a cabin, a shed, a driveway -- consider a fixed-mount tilt bracket rather than relying on the kickstands for daily positioning. The Renogy 200W's handle-and-kickstand design is optimized for portability, not for permanent installation angles.
For internal reading on this specific panel, the long-term review at Renogy 200W Portable Solar Panel Review covers six months of real output numbers and durability observations. And if you want the case for why this panel consistently outperforms its price point, see 10 Reasons the Renogy 200W Solar Panel Charges a Power Station Faster Than You Expect.
The Renogy 200W does everything described here right out of the box -- no extra hardware needed for most stations.
MC4 output cables included, four kickstands built in, IP65 waterproof rating, and a proven 200W monocrystalline output that makes the recharge math work for a standard 1000Wh station. Rated 4.6 out of 5 stars from real users.
Amazon Check Today's Price on Amazon →